
Christmas Muddy Buddies, aka Puppy Chow, are one of those no-bake holiday treats that disappear the second you set the bowl down. They’re crunchy, sweet, snowy-looking, and a little bit dangerous because you can’t stop grabbing “just one more” handful. This version is made with white chocolate instead of peanut butter, so it is extra sweet and perfect for Christmas parties, movie nights, cookie trays, edible gifts, or late-night snack attacks while wrapping presents.
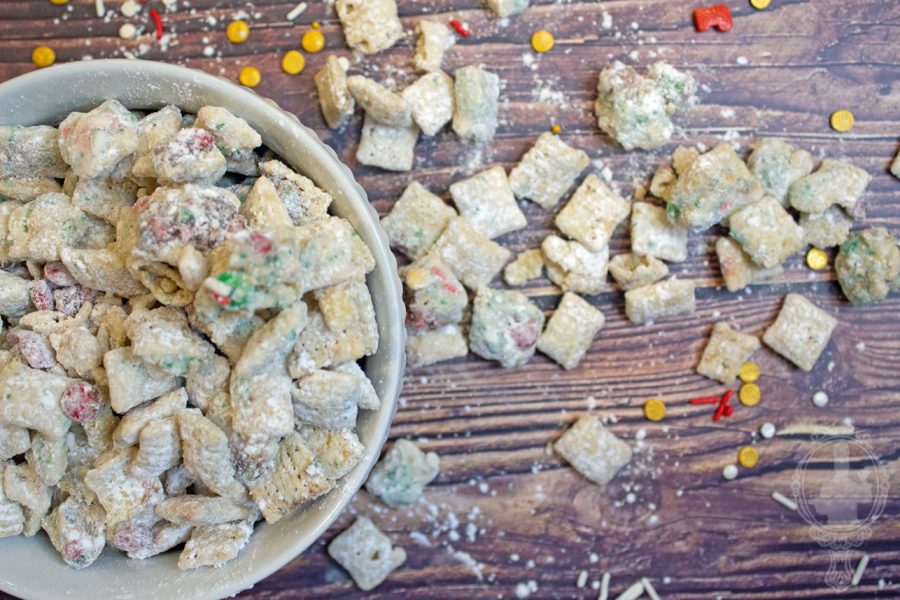
Is it puppy chow or muddy buddies?
Basically, they are the same crunchy cereal snack mix, just with different names depending on where you grew up. Puppy Chow is especially well known in the Midwest, while Muddy Buddies is the name many people recognize from Chex-style snack mixes. Either way, it is definitely made for humans, not pups. You can customize it for almost any holiday or event by changing the candy colors, sprinkles, chocolate, or mix-ins.
What are muddy buddies made of?
Traditionally, the cereal, usually Chex cereal, is coated with a melted mixture of chocolate chips, butter, peanut butter, and vanilla extract. Then it gets tossed in powdered sugar until every piece has that snowy, sweet coating. Over time, people have come up with all kinds of variations, including peanut butter-free versions, white chocolate versions, peppermint versions, and holiday mixes loaded with M&Ms, pretzels, marshmallows, or sprinkles.
Fun facts about muddy buddies…
- They are also known as Puppy Chow, Reindeer Chow, Muddy Munch, Monkey Munch, or Christmas snack mix.
- The name Puppy Chow most likely came from the way the chocolate-coated cereal looks before it gets covered in powdered sugar.
- This treat became popular because it is simple, inexpensive, and easy enough for kids to help make.
- The best part is the texture: the outside is sweet and powdery, while the inside stays light and crunchy.
- Changing the candy colors makes it work for almost any season: red and green for Christmas, pastels for Easter, orange and black for Halloween, or team colors for game day.

How to make Christmas Muddy Buddies…
Just scroll down for my recipe. Keep in mind, you can change up the candy used and the type of baking sprinkles to make it your own. Red and green candies make it Christmas-y, crushed candy canes make it peppermint-y, and mini marshmallows or pretzels give it that fun sweet-and-salty snack mix vibe.
Tips and tricks for the best Christmas Muddy Buddies…
- Use a very large bowl so you have room to gently stir without crushing the cereal.
- Melt the white chocolate slowly and stir often. If it gets too hot, it can seize up and turn thick instead of smooth.
- Add the cereal in batches if needed. It is easier to coat evenly when you are not fighting a giant bowl of cereal.
- Let the coated cereal cool slightly before adding chocolate candies, especially if you do not want the colors to melt or smear.
- Shake the powdered sugar on in a large zip-top bag or a big container with a lid. It makes coating easier and keeps the mess under control.
- If the mix looks a little wet, add a small extra dusting of powdered sugar and toss again.
- Want more crunch? Add pretzels, toasted coconut, peanuts, or holiday cereal pieces after the coating sets.

Serving suggestions…
- Serve it in a big festive bowl for Christmas parties, movie nights, game nights, or cookie decorating days.
- Spoon it into clear treat bags, tie with ribbon, and give it as a quick neighbor, teacher, coworker, or hostess gift.
- Add it to a holiday dessert board with cookies, fudge, peppermint bark, fresh fruit, and small candies.
- Package it in mason jars or Christmas tins for an easy make-ahead edible gift.
- Set out small cups or scoops so guests can grab their own serving without everyone reaching into the same bowl.
- Mix it with popcorn for a sweet-and-salty party snack, or sprinkle a few pieces over ice cream for a fun holiday dessert topping.
Storage tips…
- Store Christmas Muddy Buddies in an airtight container so the cereal stays crunchy.
- Keep it at room temperature for a few days if your kitchen is cool and dry.
- For longer storage, keep it in the refrigerator. The coating will firm up and the mix will stay snackable.
- You can also freeze it in a freezer-safe bag or container. Let it sit at room temperature for a few minutes before serving.
- If adding marshmallows, pretzels, or candies, fold them in after the coated cereal has cooled so everything keeps its shape and texture.
- Avoid storing it near warm appliances or sunny windows, especially if you are using chocolate candies or white chocolate.

Other Christmas goodies…
ITEMS/INGREDIENTS USED IN RECIPE – Hey, if you like any of the items I may have used (or are similar to the items I used) in making this recipe, I have listed some of them below. NOTE: These links are affiliate links of which I receive a small commission from the sale of certain item. This does not affect your price, it remains the same.
If you like this or any other dish on my site, please feel free to sign up for the weekly email where you can see what new recipe we have created over here. Just look over to the side and you’ll find the “sign up” button.
If you have any questions or see any “blooper” we made, please don’t hesitate to contact us. We’re all human.
This post may contain affiliate links. Please view my disclosure policy for more information.
Rock on!
~Bobbi

Christmas Muddy Buddies
Equipment
- 9 x 13 Baking Sheet
Ingredients
- 4 1/2 Cups Crispix or Chex Cereal
- 1 Cup White Chocolate Chips
- 6 Tbsp Butter
- 1 1/2 Cups Powdered Sugar
- 1 Tbsp Green Sugar Sprinkles
- 1 Tbsp Sugar sprinkles Red or Green
- 1/2 Cup Mini Red and Green Baking Bits

Instructions
- Pour cereal into a large bowl.

- Melt white chocolate chips and butter in a small bowl in the microwave for a total of 45 seconds to 1 minute. Stir after 20-30 seconds. (Or your preferred method of melting chocolate)

- Pour melted chocolate over cereal and mix well. Pour into a gallon size baggie. Add powdered sugar, sprinkles and baking bits. Shake well to cover completely.

- Pour mix out on a cookie sheet in a thin layer. Let set for about 30 minutes to an hour.

Notes
Nutrition


