
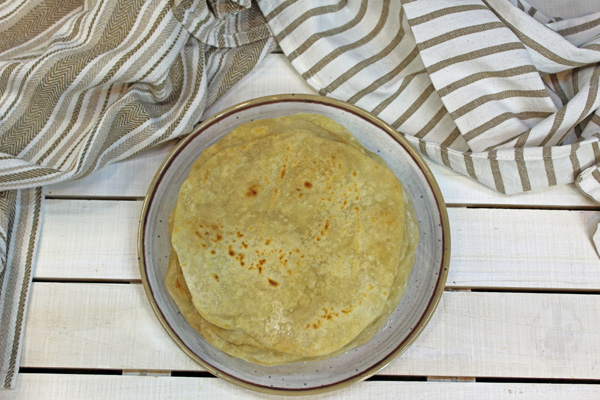
Homemade Flour Tortillas only need 5 (including the water) ingredients to make. Make them in advance and use them instead of those store bought tortillas that you have no clue what’s in them.

Just to be up front with you. This was the first time I made homemade flour tortillas from scratch. And to be honest I thought I would have to do it several times before I posted it. I was shocked and proud all in the same moment. What an easy tortilla recipe if I say so myself.
I made these flour tortillas without a press. How? A rolling pin. Does it take more time, yes. But, I had to make it this way at least one time. I tend to challenge myself, even when I don’t need to. Next time I bet I’ll use a press.
How to make flour tortillas…What to do
Just make the dough using all purpose flour, salt, baking powder, shortening and hot water. Let it rest for 20 minutes. Then roll them out and then cook them. The time sucker here it splitting the dough and then rolling each individual tortilla. Once you’re past that stage, each tortilla takes 2 minutes max to cook.
How long do flour tortillas last?
Believe it or not, flour tortillas last longer than bread. Flour tortillas last a week in a pantry and 3-4 weeks in a refrigerator. You can make these way ahead of the game. Make them to have something to grab and snack on.
What can I use flour tortillas for?
Melt some cheese on them. Make Wraps, like the ones I made, Popcorn Chicken Wraps. Make burritos, or enchilada. How about some sopapillas??
I didn’t use homemade flour tortillas on my recipes I just listed above, but you can always substitute them whenever time is on your side. The good news is with a homemade flour tortilla recipe, you will always know what ingredients are in it. Right?

ITEMS/INGREDIENTS USED IN RECIPE – If you are interested in any of the items I may have used (or are similar to the items I used) in making this recipe, I have listed some of them below. NOTE: These links are affiliate links of which I receive a small commission from the sale of certain item. This does not affect your price, it remains the same.
- Silicone Baking Mat
- Rolling Pin (love this thing!!)
- Frying Pan
If you like this or any other dish on my site, please feel free to sign up for the weekly email where you can see what new recipe we have created over here. Just look over to the right hand side of this page and you’ll find the “sign up” button.
If you have any questions or see any “blooper” we made, please don’t hesitate to contact us. We’re all human.
Tried one of our recipes? We would love it if you would let us know what you thought or if you have any suggestions.
Speaking of suggestions? Have any? If so, please email me at bobbie@throughthecookingglass.com .
This post may contain affiliate links. Please view my disclosure policy for more information.
Rock on!
~Bobbi

Homemade Flour Tortillas
Equipment
- Rolling Surface (Mat)
- Rolling Pin
- Skillet (regular or cast iron)
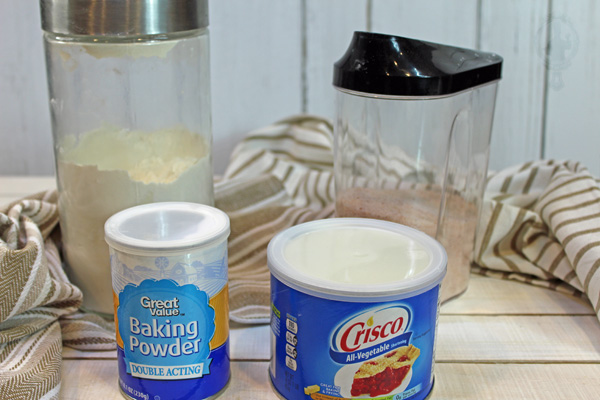
Ingredients
- 3 Cups Flour, all purpose can use unbleached
- 1 Tsp Salt I used Himalayan
- 1 Tsp Baking Powder
- 1/3 Cup Shortening Could use lard
- 1 Cup Hot Water
Instructions
- Stir together flour, salt and baking powder in a bowl.
- Using your hands, mix shortening into the flour mixture. Should look like chunky crumbs.

- Slowly add the hot water into the mixture until the dough forms. (using your hands or a spatula)

- Remove dough from bowl and place on floured surface. Knead the dough until smooth. 3-4 minutes.

- Divide into 16 equal pieces. Roll each piece of dough into a ball. Place on baking sheet/dish.
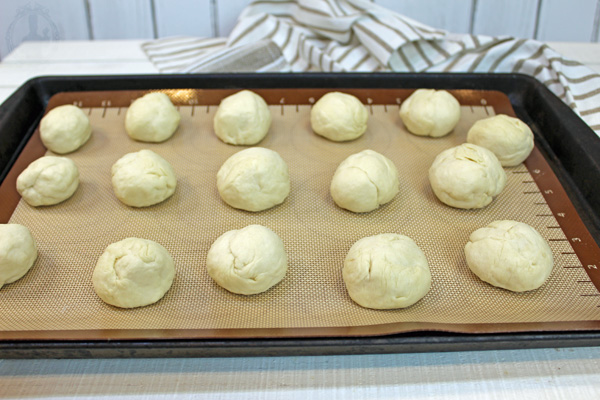
- Cover with plastic and let rest for 20 minutes.

- On your floured surface, roll out one of your balls to about 8"-9" round flat "tortilla" shape.

- Preheat a skillet on medium heat. About halfway through rolling your tortillas.
- You can place these on wax/parchment paper. Do not stack on top of each other.
- Place one of the rolled doughs in the sprayed preheated skillet and cook 45 secs to 1 minute. Until you see bubbles start to form. (I used avocado spray)
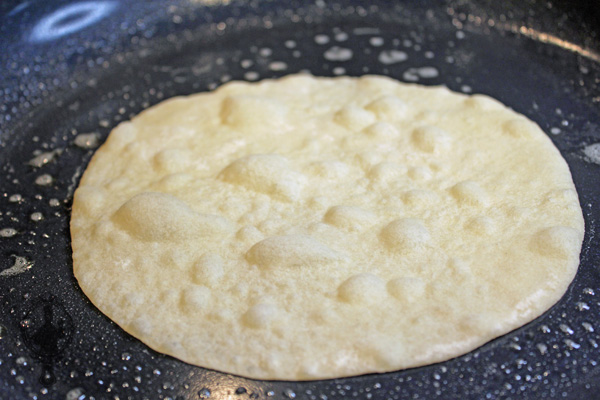
- Spray the top side of the tortilla then flip and cook the other side about the same time, until you see the bubbles. The bubbles/spots should be golden. Place on plate and repeat the process for the remaining "doughs".

Pingback: Breakfast Enchiladas with Country Gravy | Through the Cooking Glass
Pingback: Easy Sopapilla Recipe | Through the Cooking Glass
Pingback: Beef and Bean Burrito Casserole | Through the Cooking Glass